my Crafty Corner

Cards and other handicrafts made by Jean Straw

Friday 28 November 2014

Autumn Lingers

Hi every one, we have had some really gloomy days this week and I am afraid this shows in my photos, The colours in this card look much nicer IRL. I bought these beautiful autumnal Chocolate Baroque stamps recently and just wanted to make sure I used them before autumn finally morphed into winter.  I have a friend with whom I swap ATCs  on a more or less monthly basis. We don't use a theme, just do whatever we like or sometimes use it as an opportunity to showcase our latest stamps, as I did here. Along with the ATCs we usually send a card in which we write a short note, these cards are sometimes quite simple and sometimes more elaborate, again depending on circumstances or time available. So this month in order to use my new stamps I used them for both the card and the ATCs, I stamped all of the images onto snippets of ivory card using black Memento ink, and coloured them with Coloursoft pencils. I used Sansodor and a paper stump to blend the colours, and then used a pastel Flexmarker to create the shadow around them. For the card I trimmed the image fairly close and matted it onto a snippet of brown pearl card. The base card is a 15 cm ivory square and I marked where the image panel would go and made an embossed line either side of it using my scoring board.
 I then stuck the panel in place, and stamped the sentiment above it with brown Memento ink.
This stamp is one I've had for years and as it is one that I removed from the wood block I can't remember the make. For embellishment I punched two leaves from snippets of brown and gold pearl card using a woodware punch, and then stuck them top RH corner. The ATC images were stamped and coloured in the same way. I liked the mushroom one just as it was so I simply used a small corner punch to round two opposite corners and then mounted it onto a snippet of the same brown card leaving a very narrow border. The image for the second one is a bit smaller so I tied some brown ribbon across the top of it and added another punched leaf. I thoroughly enjoyed colouring these lovely images so I hope my friend likes them too. We have never met each other by way, I think we came into contact  through the Craft Stamper ATC swap and she asked me if I would like to swap with her one to one. That was a few years ago now and we are still going.
I am going to enter this at Pixies Snippets Playground - Use Snippets

Thankyou for visiting here today, I hope I haven't bored you all with the swap stuff. Thank you also for your comments, I really appreciate them all.
Jean

Tuesday 25 November 2014

Three Rudolph Day Cards

 It's 25th November already which means it is the last Rudolph Day for this year and although I am a bit late turning up I have got three cards to show you today. It is also the last RD to be hosted by Sarn at Stamping for Pleasure, and I would like to thank her for this  friendly challenge which has revolutionised my christmas card making so that I no longer have a mad panic about now to get enough cards made in time for posting. This year I have a nice box full already made and just have a few close  family ones still to make. RD is all set to continue next year though as it is to be taken over by Scrappymo, of  Scraps of Life by Scrappymo.
A crafting friend of mine gave me some die cut christmas ornaments and ribbons that I wanted to use so my first two cards are designed around them. They were mostly cut from red satin card and gold mirri card  so I began by pairing up the solid and filigree cuts as you can see. I think I had to take the photo under my craft light as good daylight is in rather short supply at the moment, and that has caused a shadow to dull the gold card in the lower bauble, but it is actually just as shiny as the top one. The base card is DL size and the backing paper is from an LOTV pad, inked around edges with fired brick Distress Ink.  The greenery was cut with a Tim Holtz Winter Foliage die and I assembled it intertwined with one of the die cut ribbon loops from my friend. I then hung the baubles from the ribbon using a fine gold peel off for a chain. The greeting is from Chocolate Baroque.


Also among the die cuts from my friend was this glittery purple ornament with the silver overlay already attached and although it not the sort of colour that I usually use for christmas it is beautiful so I looked for some card to go with it. I found this snippet of pale pink pearl card and cut it with my favourite Spellbinder die from the Marvelous Squares set. I also used the largest die from this set to cut a mat from another snippet of textured silver card which just fitted onto a 4" square base card. I  layered everything up and added a purple metallic bow to the bauble and a tiny christmas greeting. I have had this little stamp for years and have long forgotten the make of it, it has a square outline round it which I don't like so I usually colour the words with a marker pen before stamping it.  I am not sure if the tiny snowflakes were punched or die cut but they were in with the other die cuts so as they matched the bauble I decided to add them to the corners.                                                                                                                                                                                                                                                                      
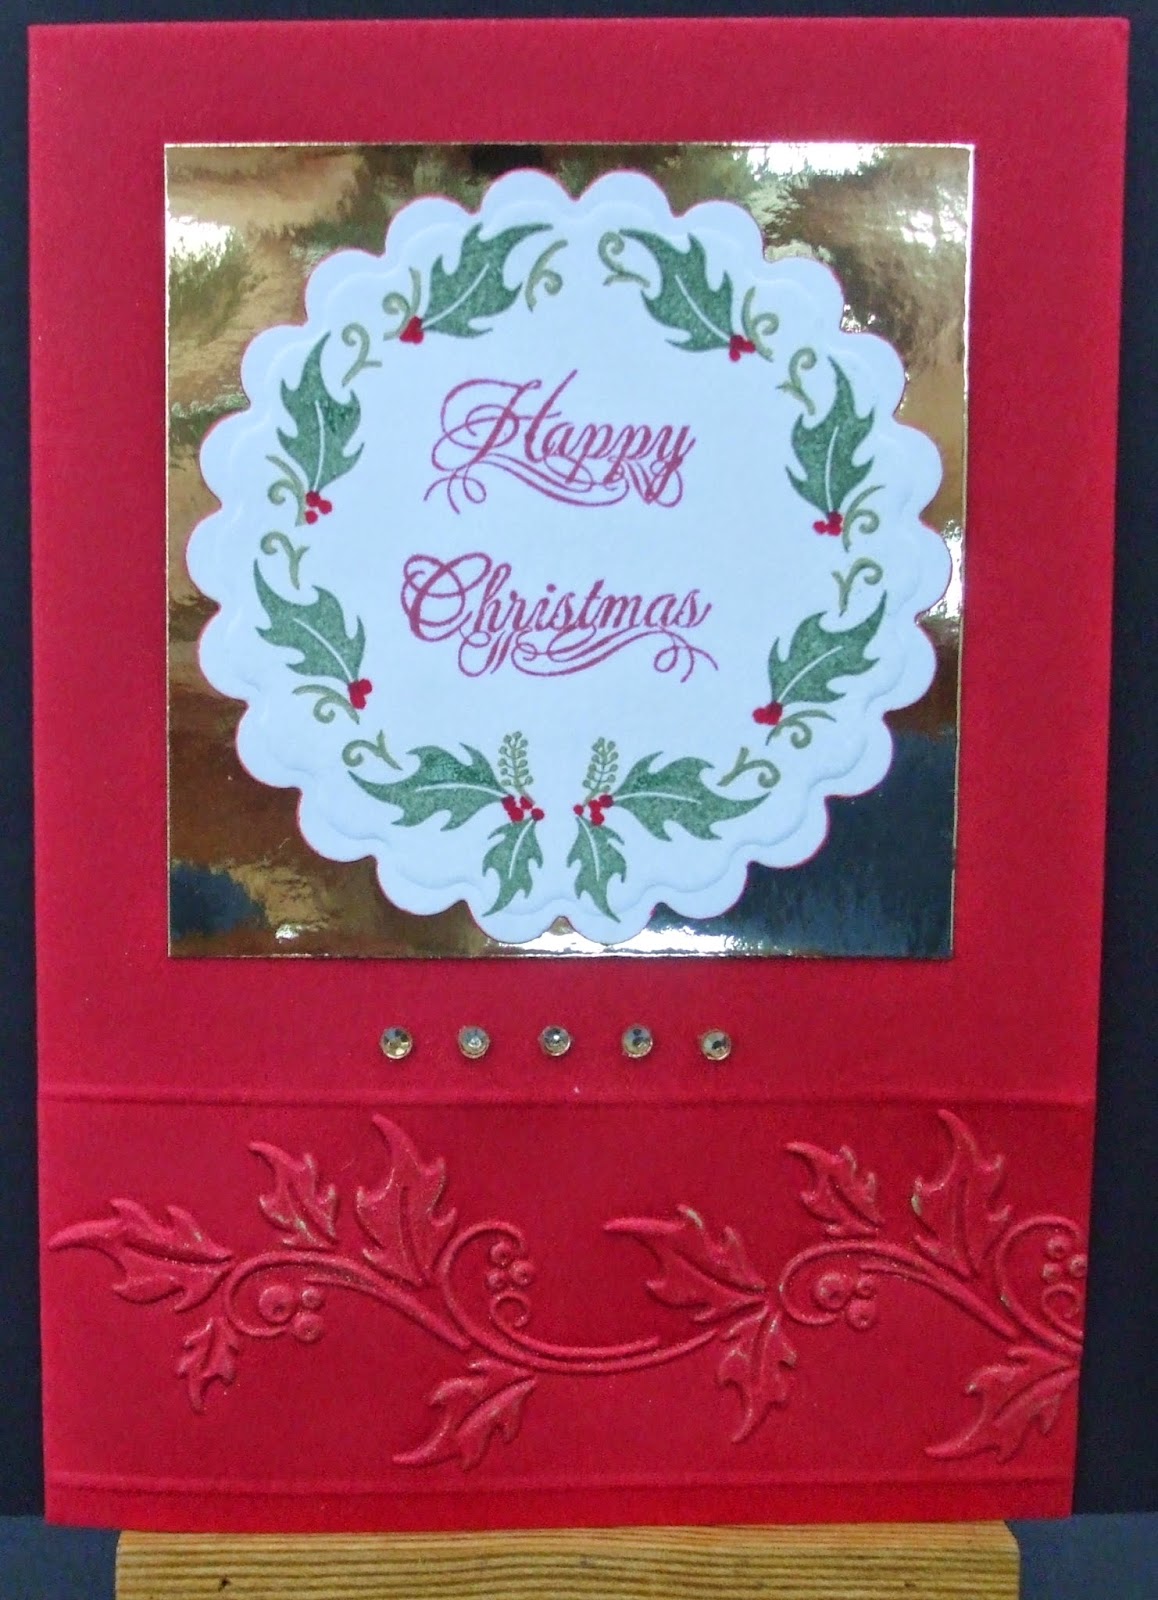
My third card is made with a stamp and an embossing folder that were  free with a craft magazine. I cut and folded an A6 base card from red cardstock. I used the free border EF to emboss across the bottom. It made a lovely deep embossing but it did sort of stretched  the card and made it look a bit wonky so to tidy it up a bit I embossed a line either side of the border with my scoring board, which helped a bit. I stamped the holly wreath with Olympia  green Versafine ink onto a snippet of white card and added the berries with a marker pen, and drew over the twiddly bits with a Sakura gold sparkle  pen. I think the greeting is from another free set. I cut this out with a Spellbinder scalloped circle die and coloured the edge with a red marker pen, and then mounted it onto a snippet of gold mirri card. When this was mounted onto the card I  added some gold coloured gem stones below the image and rubbed a little gold wax over the embossed panel for highlights.


As I used quite a few snippets in the making of these cards I am also going to skip over to see what everyone  else has been making at Pixie's Snippets Playground.
Thank you for visiting my crafty corner today and for your comments all of which are really appreciated.
Jean


Monday 17 November 2014

Sweet Birthday Card

Last Friday was my Great Granddaughter's 2nd birthday and this is the card I made for her. This sweet little teddy is from LOTV, stamped with Memento Rich Cocoa ink onto a snippet of white card and coloured with Promarkers. All of the papers are LOTV as well, from the same pad, Bonnets and Bowties, I think. Having coloured it I die cut the image with a Spellbinders Exquisite Circles die, and then using the same die cut it from the pink paper. I then stuck them together offsetting them slightly so that the pink showed to one side. My base card is a 15cm square and I cut a piece of thin scrap card just very slightly smaller to make the background on as I wanted to wrap the ribbon around it and thought it needed to be a bit more substantial than the paper.  The pink patterned paper is cut along the edge with a Britania  die and the top border of the check pattern cut with the scallop edge on my paper cutter. I layered the papers onto the scrap card and secured the ribbon at the back before sticking the whole panel onto the card. The image was fixed in place with thin foam tape and a short piece of ribbon tied around the ribbon band. The greeting is cut with Britannia dies in three layers, which was made easier with the use of a Stick It sheet. Still a bit fiddly though. Once the layers were joined together I gave them a coat of Glossy Accents and when dry added them to the card.
I am taking this over to Pixies Snippets Playground, I used a snippet of white card for the stamping and the checked paper was a snippet as well. There is a great prize on offer if you fancy having a go, you just need to use at least one snippet in your project to enter. I'll see you there.
Thanks for dropping in and for your comments which I really appreciate.
Jean


Tuesday 11 November 2014

Baby Ripple Blanket.

Hi again, I have just finished another little baby blanket for Africa and I thought you might like to see it as I had such a good response last time, and I thank you all for your lovely comments. This one is in ordinary crochet and more bright colours as that is what I already had. I have been reading Lucy's blog at Attic24 recently and I have been totally inspired by her beautiful blankets and her enthusiasm for crochet and wanted to try out this lovely ripple stitch straight away. I picked ten colours from my stash that looked like they had enough left to do the job. They are very random and not really chosen to work together particularly well although I think in reality they look slightly better that they do in this photo which has distorted some of them especially the pink.
Once again the size is approximately 1mtr square, and I know it doesn't look like a square here but I think that must be down to the angle I took the photo from.(ie. balancing on the edge of the coffee table) to try and get above it. I am really quite pleased with the way it has turned out and it only took me about a month to make which is quite quick for me as I only do it when watching TV, and I don't really do a lot of that. Here is a little close up of the stitches and the simple border. I am now just going to knit a couple of little cardigans to fill up the parcel before I send it off
and then I am going to have a little rest from Africa knitting to work on some stuff for myself. I have a pattern I want to knit for my baby great granddaughter before christmas and then I would really like to make a blanket for myself with one of Lucy's yarn packs which I am hoping to have as a christmas present.
Thank you for taking time to visit me and for your comments which are all really appreciated
Jean x


Friday 7 November 2014

Butterfly Fantasy

Hi everyone, the card I have to show you today was made for Mrs. A's Butterfly Challenge where the theme is to use three designer papers. When I made this butterfly it was with the intention of entering it in the previous challenge which was to use either heat or dry embossing on the butterfly but then I realised that another week had whizzed by and I missed the deadline. I had stamped the Chocolate Baroque butterfly with Versamark ink onto one of my Brusho practice pieces and used WOW Halloween embossing powder  which is made up of fine black powder and gorgeous copper glitter. As I had used watercolour paper originally the black didn't come up very shiny but it had melted enough to hold the glitter in place. The close up below shows how glittery it is. I liked the way the butterfly turned out so when I saw what the new challenge theme was I looked for some papers to go with it. I found this 6"x6" pad of grey to
black, and white that came from The Works some time ago. I chose three designs and cut strips to fit the front of a 15cm. square card, using
 my scallop cutter for the centre piece.I placed the butterfly with silicon
glue to raise the wings slightly.
The greeting is also from Chocolate Baroque, stamped onto a snippet of the same paper, cut with a spellbinder label die. ( I'm sorry I don't know which one.) This was mounted onto another of the papers cut with the next size die and then onto white card cut by hand after drawing round the outside of the die. The little flowers are punched out of the same piece of paper as the butterfly with an Xcut punch, and a tiny amber coloured gem placed in the centre of each.
Thank you  to all who come to take a look and for the lovely comments you leave, they are all really appreciated.
Jean