my Crafty Corner

Cards and other handicrafts made by Jean Straw

Sunday 29 June 2014

Flight Of Fancy

I have a quick card to show you today which I made in order to enter at Mrs A's Butterfly Challenge where the theme this time is Monochromatic. I used a stencil from Memory Box on ivory card and three shades of Brilliance ink applied through the stencil with a brush. The shading has not photographed too well, it looks better IRL. Before removing the stencil I stamped a butterfly stamp onto the two largest butterflies. The stamp was not exactly the size or shape of the apertures but with help of a stamp positioning thingy I managed a reasonable result.I trimmed the panel down a bit and brushed some of the lightest shade of ink around the edges and matted it onto some toning pearlised card and then attached it to the front of an ivory base card.The greeting is stamped with darkest shade of ink. The bodies of the stamped butterflies didn't quite match up so I added the pearls as a cover up as well as embellishment.

Thankyou for taking a look and for the comments you leave which all really appreciated.

Wednesday 25 June 2014

Flowers for Rudolph.

Once more another month has passed and it the 25th again which means it is Rudolph Day at Stamping For Pleasure,  which is where Sarn encourages us to get ahead of the game by making two or more christmas cards each month. Here are my two for this time.

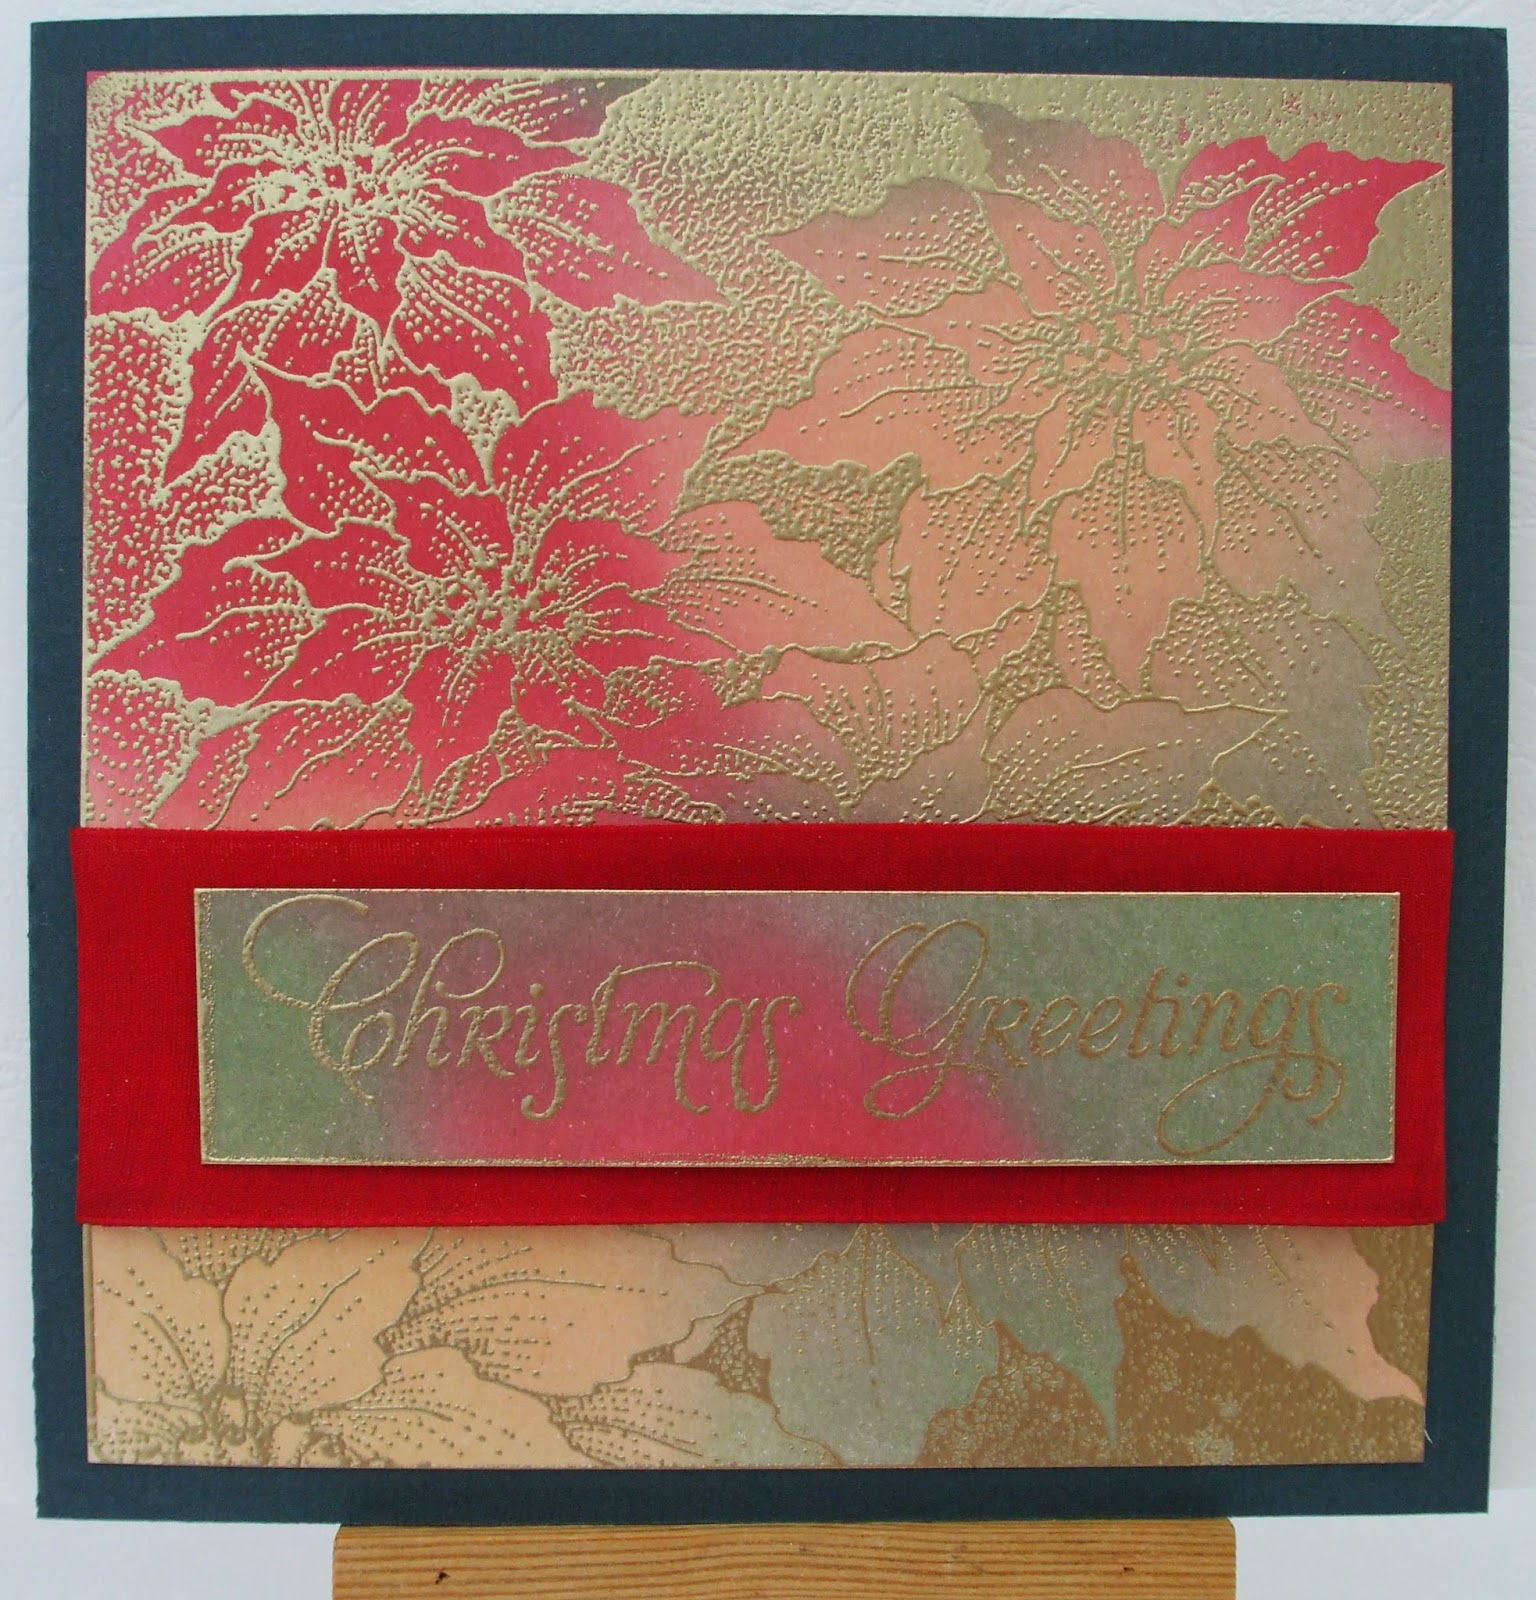
I started off with a sizeable piece of white card that was left after stamping the image that I used in my last blog post.I used Pan Pastels in red green and yellow and applied them randomly to cover the card to create a christmassy coloured background. I then used Versamark ink to stamp this large Chocolate Baroque background stamp one and half times and then embossed with WOW gold embossing powder. I trimmed the whole image close to the edge and wrapped it round with some red linen ribbon and then mounted it onto a square dark green card blank. The
greeting is also from CB and was stamped onto a strip of the coloured card and embossed with the same gold EP. I also used the Versamark ink pad to ink the edges and embossed with the gold.I then attached it over the ribbon with thin foam tape.

For the second one I used the half stamped image and trimmed it tidy and edged it with a gold Krylon pen, and then mounted it onto a piece of dark green card.This time I used an A6 ivory card blank and the same red ribbon. There wasn't any more of the Pan Pastelled!!? card so I used a bit of the dark green matting card for the Joy stamp, another from CB. Again I embossed the word and the edges with gold EP. I also used foam tape again to attach to the card and the added a few green and red gem stones for decoration.

I apologise here if I have missed anyones blog as I have had the same problem with blogger dashboard for the last few days as many others seem to have had. Fortunately  it appears to working OK today.

Thankyou for visiting and for your comments, I really appreciate them.

Monday 23 June 2014

Yellow Roses

This is the card that I have made for my sisters' birthday at the weekend, she doesn't read my blog so I am safe to show it to you today. I started by stamping this rather lovely stamp from Just Rite Stamps onto white card with Memento London Fog ink. I then coloured it with mainly Coloursoft pencils blending with Sansoda and a paper stump. For the pink flowers I used two water colour pencils and blended with a water brush. I also went over the scroll work with a Sakura silver sparkle pen. I trimmed close to the image and found a snippet of gunmetal mirri card to mount it on. When I first got this card in a mixed pack of metallics I wasn't sure about it, ( it is quite a dark silvery colour ), but it has been very useful when a contrast matting is required but with the nice shine of metallic. Alas it is all gone now as this was the last bit and I just had enough to die cut the greeting with a Britania die. Having fixed the image to the mat I wrapped some yellow satin edged organza ribbon around it an fastened it at the back and then tied a bow onto the front. I cut a piece of thin yellow card to fit the front of a 5" x 7" card blank and trimmed the bottom edge with a Fiskars border punch and used a scoring board to emboss a line across. When all was fixed together I glued the greeting in place.

I will be taking this over to Pixies Snippets Playground as even the use of just one snippet gets you through the gate, although you can of course use as many as you like as the idea is to use up some of the piles of snippets that we all keep "just in case".
I am also entering at Vintage Stamping Challenge - Summer Blooms

Thankyou for visiting and for your comments, I really appreciate them.


Sunday 15 June 2014

Anniversary Card

This is the card that I made for my Daughter and Son in Law's anniversary which was actually at the end of last month, I just haven't got round to blogging it sooner.The base for this was cut from white pearlised card to make a 5.5" square card. The circles were cut and embossed from snippets of purple and lilac pearlised card using Spellbinders Exquisite Circles with a silver peel off greeting added and some lilac gems. The silver leafy frond is a Marianne die and I found it in my box of odd die cut bits, so it is also a sort of snippet. I made the little roses using a Britannia die and snippets of Johanna Sheen Elegant Satin paper which I then coloured with Promarkers before making them up.I finished the card with some lilac scallop edged ribbon with a bow in the corner and topped with a lilac fuzzy coated heart shaped brad from my stash. As usual the colours have not photographed well and I promise they do match a lot better IRL.
With all the snippets I used I can take this over to the Pixies Playground and join in the fun there.
I am also entering at Paper Creators Crafts - Wedding /Anniversary
                          Crafty Ribbons Challenge - Anything Goes With Ribbon
                           Southern Girls Challenge - Dyeing To See Those Punches - use die cuts or punches

Wednesday 4 June 2014

Summer Birthday

While I was searching the LOTV website recently looking for the baby stamp that I used in my last post I spotted this one as well and thought it would make a nice summery birthday card.
I stamped it onto a snippet of white card with Memento black ink and coloured it with Promarkers. Then I used the largest of the Exquisite Circles dies from Spellbinders Majestic Elements to cut it out and added a little blue ink to the edges. The backing paper is is from the LOTV Bonnets and Bowties pad that came free with a recent magazine. I cut it to fit on the front of a 6" square card. I used a snippet of red card to cut a square mat using the largest die from the Marvelous Squares set. When you use this die you get a nice  square with shaped corners and pinprick holes all round the edge, but it also embosses an edge outside of the die which if you cut round carefully makes an attractive frame. I did this and fixed it to the front of the card with narrow DS tape. I stuck the stamped image to the red mat and then I made a little tag for the birthday greeting by using the smallest die from the Card Creator set, also from Spellbinders, using white card, and stamping the greeting with Brilliance rocket red ink. I drew round the outside of the die onto red card and cut it out by hand to make a narrow border. I used a tiny red brad to attach this to the edge of the stamped and mounted image, and used thin foam tape to fix this to the card.
I am going to enter this at Sugar Creek Hollow where the challenge is Eat and Drink,
and at Mrs A's Butterfly Challenge where it is Butterfly Bingo, I have used DieCut, Butterfly and Designer Paper and of course as I have used several snippets I am scurrying over to Pixies Playground again.
 Thank you all so much for dropping by, and  for your comments which are all really appreciated.                                  


Sunday 1 June 2014

A Good News Day

Good news day because our second little great granddaughter, Kaycie was born in the early hours of this morning. In spite of being 3 weeks early we knew her birth was imminent and that she was a girl so I had time to make this card in readiness.
I stamped the LOTV image with Memento black ink and coloured it with Promarkers. I used a Spellbinders scalloped circle die to cut it out, and the largest die from the Majestic Elements set (also Spellbinders) to cut the pink mat. I used a 6" square card and cut matching pink card to almost cover the front. Onto this I stuck panels of two LOTV papers from their Bonnets and Bowties collection which I got free with Simply Cards and Papercraft magazine. I wrapped lace and pink gingham ribbon around the whole panel before fixing to the card. I mounted the matted image with foam tape over the ribbon and stamped Congratulations, ( I'm not sure what make that stamp is).Then I added a bow, a charm and a little pink teddy which has been in my stash for years,left over from a scrapbook project.
As I used a piece of card from the white snippets box for the stamping I can take this to the Pixies Playground. The other pixies are all a very talented and fun loving bunch why don't you pop in and take a look, you only need to use at least one little snippet on your project to get through the gate.
I'll be back soon as I have some other cards to show you.
Thank you for taking the time to visit my corner of blogland and for your comments, they make me happy.